Connecting your Framer site to your Engyne blog involves the below two steps:
- Add a custom subdomain to your Framer site
- Connect the subdomain to Engyne
Let's get started!
Step 1: Add your custom domain
Navigate to Site Settings > Deployment > Add a custom domain.
Add the below entries to your DNS records. If you already have your Framer site on your domain, this will remove it, but don't worry—we will bring it back with Step 2.
Make sure that there are no other A or CNAME records that have name
@in your DNS
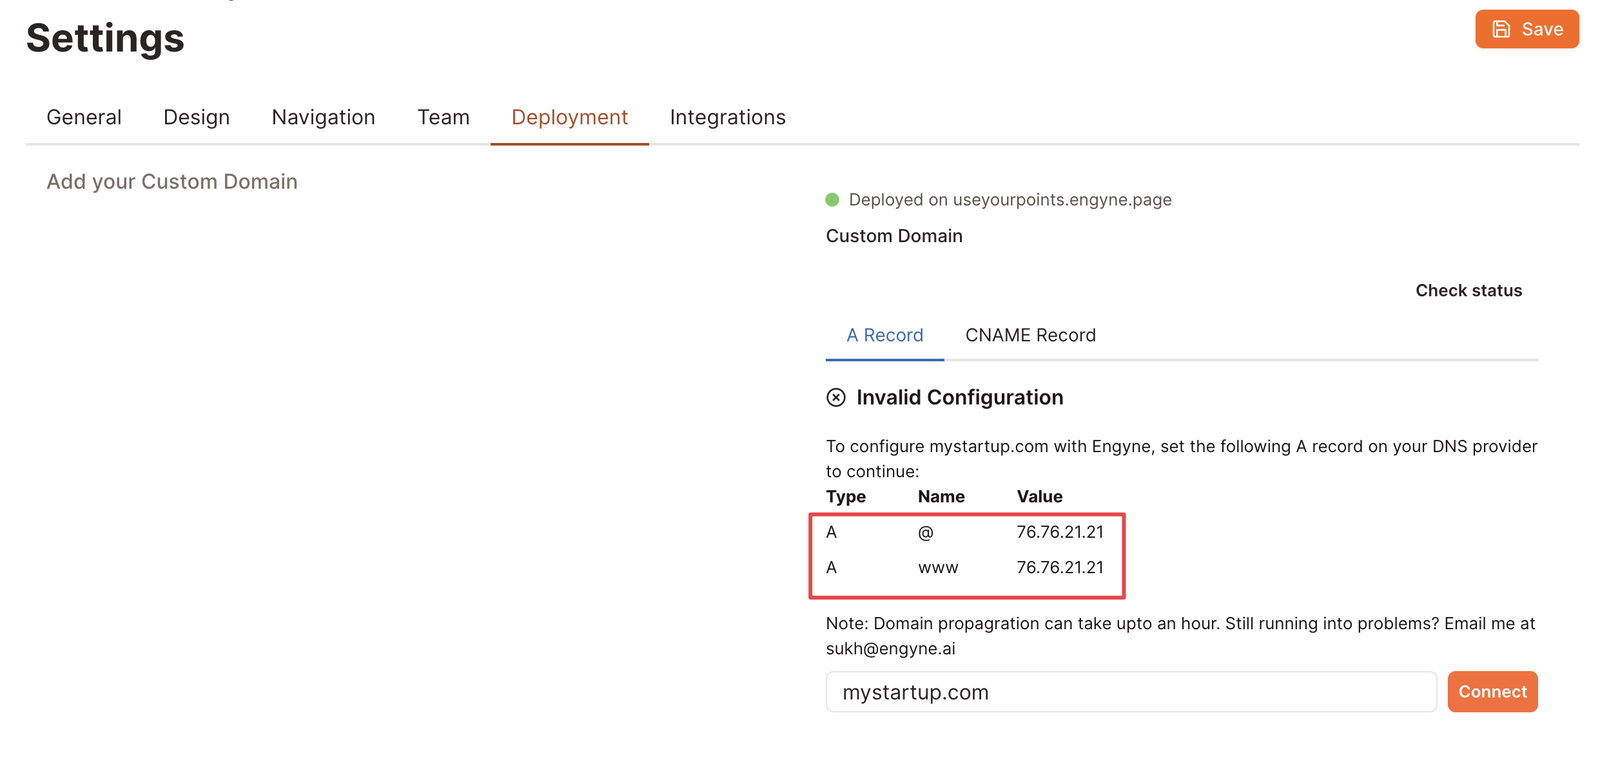 A Record DNS records to assign Engyne blog a custom domain
Once connected, you should see the Engyne blog load on your custom domain.
Step 2: Deploy Engyne as /blog subfolder
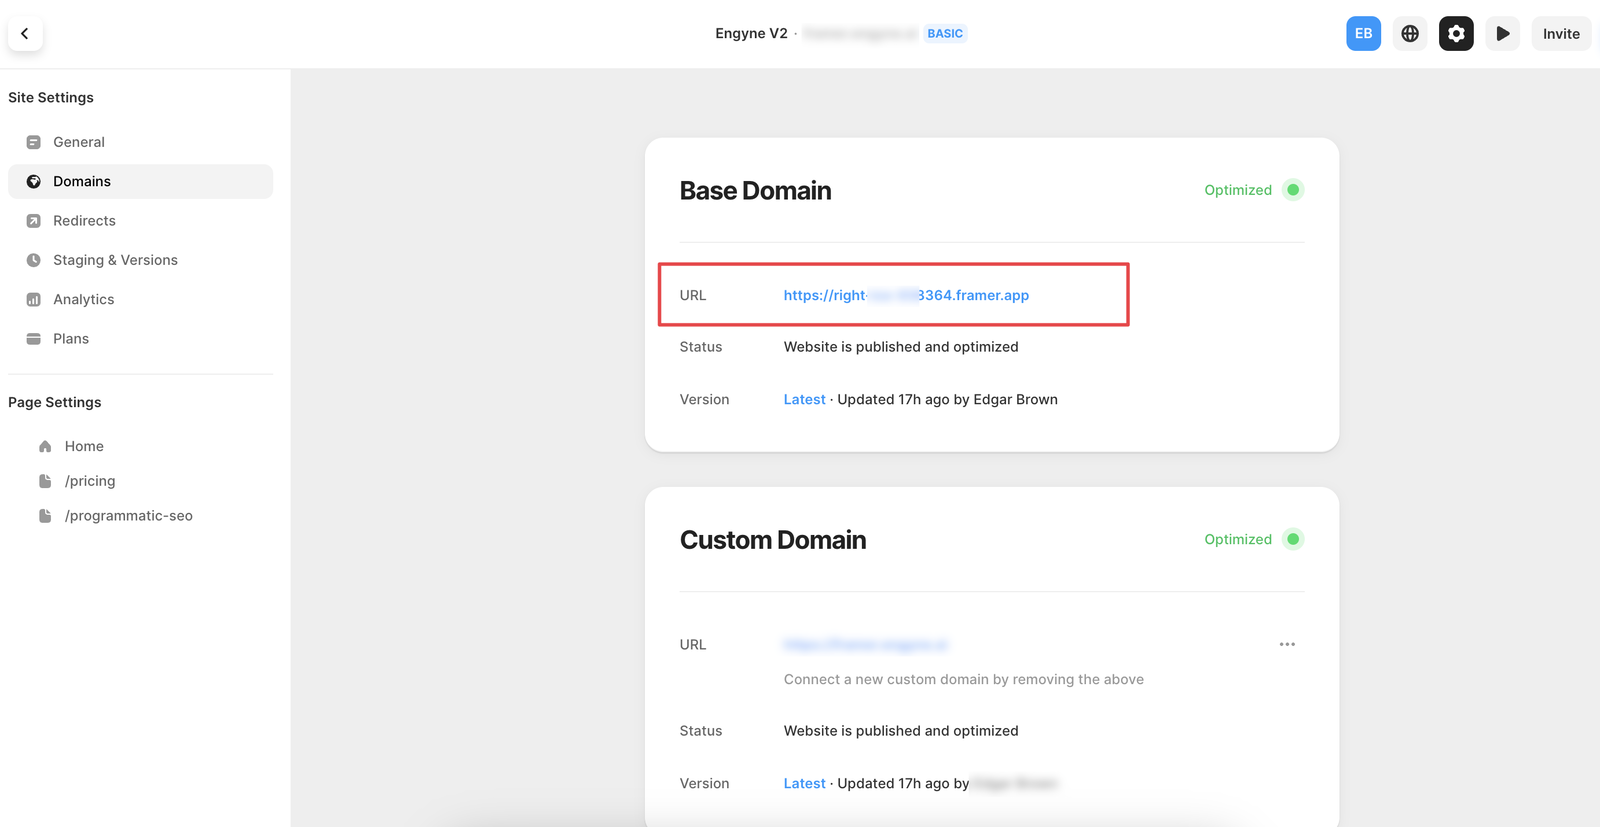
When it's connected, toggle the Enable subfolder option. Choose Framer as your frontend service. Your Framer-hosted URL can be found in Framer Settings > Domains > Base Domain.
Leave /blog as the blog subfolder. Click Save and voila!
All your Framer pages will be on the root domain and /blog will be the Engyne blog pages.
FAQ
Why are my blog posts showing 404?
Ensure your blog post slugs start with /blog, e.g. /blog/post-1. Basically the subfolder you selected to host your blog home page in Settings > Deployment > Enable Subfolder should be the prefix of every blog post you create. Once you have successfully set up the subfolder, any new post created will automatically have this. Only the existing posts that were created before the setup need to be fixed.